Showing posts with label Sizzix. Show all posts

Friday, October 1, 2010

Enjoy Every Moment Blog Tour


For those of you arriving here via Mercedes Weber's blog, welcome! Mercedes is part of the monthly Stamp 'n Chat group I attend and she is a super stamper.  I always look forward to seeing what Mercedes creates.  I'm so thrilled to be a part of the Enjoy Every Moment Blog Tour. All this week I've been posting Halloween treat packaging ideas. Today's post is the highlight culminating the end of Treat Week and I saved the best for last. Here are 3 unique packaging ideas using mainly Sizzix dies, all exclusive to Stampin' Up.
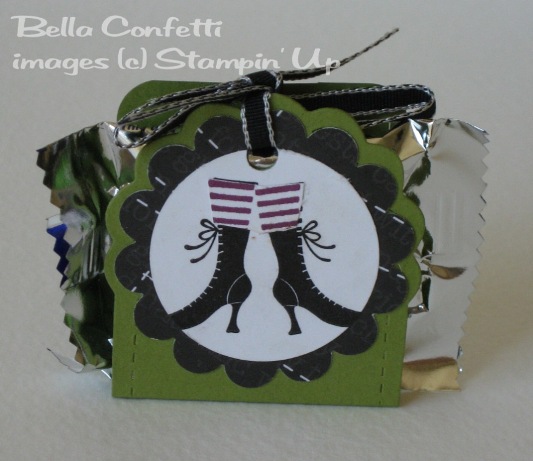


Front View


Back View

The Haunted Tombstone treat is made with the Matchbox die.  I ran the slider portion thru the Spider Web embossing folder, then sponged with Whisper White Craft ink to really pop the web and give it an eerie, spooky effect.  The sides of the "tombstone" are lined with manicured "grass" which are just strips of snipped Old Olive cardstock.  "RIP" was die cut from the Timeless Type Sizzix Sizzlits Alphabet set and the little bat is from the stamp set Fang-tastic.  I stamped it first in Whisper White Craft ink and then hand cut it.  Lastly the gigantic full moon is punched with the 1 3/4" circle punch.

The middle treat is made with two Basic Black panels cut to 4.25" x 5.5" which are attached to a small paper bag.  I wheeled Frightful Fence using Versamark ink and then heat set with clear embossing powder.  Then I sponged Whisper White Craft ink again to create a cloudy Halloween nite scene.  The full moon is punched with the 1 3/8" circle punch and the witch, sentiment and pumpkin on the flip side are also from the Fang-tastic stamp set.

Lastly the abandoned Haunted House is made with the Milk Carton die.  The roof is just rows of Basic Gray cardstock punched with the Scallop Edge Border punch.  The door is a Word Window punch cut on one end to form a straight edge for the bottom.  The boarded up windows are made of 1/8" strips of Crumb Cake.  The black fence is a Martha Stewart border punch.

I hope you are inspired to create some of these Halloween treats!  The next person on the Enjoy Every Moment Blog Tour is the talented Brenda Keenan; I've been lucky enough to receive some of her swaps at Convention.


Wednesday, September 29, 2010

Trick or Treat Smell My Feet


Welcome to Day 3 of Treat Week.  Today's Peppermint Patty treat is encased in a holder made from the Sizzix Two Tags die exclusive to Stampin' Up.  The lovely witch's feet is from the stamp set Wicked Cool and I paper pieced the Rich Razzleberry stockings.  I was really surprised when I opened the bag of Peppermint Patties and discovered that the candy wrapping had changed.  I wanted neatly wrapped circular candies but found a four-sided treat instead; thus the treat is peeping out from within its packaging.


Stampin' Up Supplies Used:

Stamps:  Wicked Cool
Ink:  Basic Black, Rich Razzleberry
Paper:  Old Olive, Whisper White, Wicked Fun DSP
Accessories:  Scallop Punch, 1 3/8" Circle Punch, 1/8" Taffeta Ribbon Black, Cropadile

Monday, September 27, 2010

Treat Week Begins!


I'm kicking off a week of Halloween treat ideas culminating with Friday's blog hop!  This treat is a pillow box cut out of heavy-duty clear sheets.  Tip:  I discovered that using a crease pad gives a cleaner cut and very visible crease lines when using thick plastic sheets.  The adorable vampire is from the stamp set Fang-tastic; isn't the accompanying greeting perfect?  It's hard to tell but I watercolored his face with Concord Crush; I know, it looks like he's got a gray, ashen face.

Stay tuned tomorrow for another Halloween treat idea.

Stampin' Up Supplies Used:

Stamps:  Fang-tastic
Ink:  Concord Crush, Rich Razzleberry, Old Olive, Peach Parfait, Basic Black
Paper:  Wicked Cool DSP, Basic Gray, Whisper White
Accessories:  Pillow Box Die, Circle Punches:  1 3/8" and 1 1/4", Stampin' Dimensionals

Tuesday, September 7, 2010

CAS FTL #106


Hope you all had a fun or relaxing Labor Day weekend.  I went camping for a few days and we had great weather all weekend; I think summer has finally arrived in the Bay Area! 

It's been a few weeks since I participated in the Clean and Simple Blog layout challenges.  I needed to make a Congratulations card for my friend Amy who's about to delliver twins.  I'm not sure what the sex of the twins are so I incorporated a little bit of blue, pink and green on this card to cover all the bases.

Stampin' Up Supplies Used:

Stamps:  Everything Nice
Paper:  Whisper White, Pink Pirouette, Pear Pizzazz, In Color DSP Pack (Level 1 Hostess), Marina Mist
Ink:  Soft Suede
Accessories:  Circle Punches 1 1/4" and 1 3/8", Stampin' Dimensionals, Billboard Decorative Strip

Thursday, September 2, 2010

Trio of Simple Cards


The lunch notes box I created a few posts ago would be perfect to hold this trio of note cards.  The focal point of each card was cut with a Sizzix die.  The card to the far left is cut from the Table Setting die and uses the spiral circle.  I didn't use the entire spiral as the flower would have been too big; I cut the spiral about midway.  The flower is cut out of felt - wouldn't it be great to have felt in exclusive Stampin' Up colors?  Imagine the possibilities!  The middle card is die cut with the Flower, Daisies #2 die (one of my all-time favorites).  Lastly the card to the right uses the Beautiful Butterflies die.  Each of the stamped sayings is from the Level 1 Hostess Set Afterthoughts with the second line masked off.


Stampin' Up Supplies Used:

Stamps:  Level 1 Hostess Set Afterthoughts
Ink:  Early Espresso
Paper:  Crumb Cake, Baja Fresh, Wild Wasabi, Whisper White, Pink Pirouette, Level 1 In Color Hostess DSP Pack
Accessories:  Sizzix Dies:  Table Setting, Daisies #2, Beautiful Butterflies; Basic Rhinestones and Pearls, Button (Retired)


Monday, August 23, 2010

Vintage Collage Tag


As I've mentioned before I like my designs clean, simple and modern.  However, I am also drawn to vintage, shabby chic and collage designs too.  This weekend it was time to exercise the vintage side of my stamping personalities.  Here's how I made the tag:  start by cutting a label from the Stampin' Up exclusive Sizzix Top Note die.  Next heat emboss the medallion image from the Artistic Etchings stamp set.  Then sponge Blushing Bride onto the medallions.  Because the images are heat embossed, they'll resist taking on any color - this is known as the Emboss Resist Technique.  After that stamp the other images from the set and sponge Marina Mist over them.  Staple Victoria Crochet Lace and the label is done!

Stampin' Up Supplies Used:

Stamps:  Artistic Etchings
Ink:  Versamark, Going Gray, Marina Mist, Blushing Bride, Melon Mambo, Early Espresso
Paper:  Confetti Cream
Accessories:  Victoria Crochet Lace, Jumbo Eyelets, White Embossing Powder

Monday, August 16, 2010

Sneak Peak: Candy Wrapper Die

f

My oh my.  You are going to love all the fun new items to play with once the Stampin' Up Holiday Mini goes live on September 1st!  Here's a sneak peek at the new Sizzix Stampin' Up Exclusive Candy Wrapper Die.  Isn't it darling?  There are so many possibilities with it!  I made mine Christmas themed using the Level 1 Hostess In Color DSP pack.  I looooooooove this paper.  I used it for practically every project I created this weekend.  I may go into hoarding mode, that's how much I love it.  Anyway, these would make great Christmas favors or even placecards for your holiday table.  The paper is 6"x6" and is just the right size for the die.  AND I went back to using my favorite reliable Timeless Type Alphabet Sizzlits dies.  I'm getting my money's worth from these dies.  They're really worth the investment.

Stampin' Up Supplies Used:

Stamps:  None
Ink:  None
Paper:  Level 1 Hostess In Color DSP pack, Early Espresso, Pear Pizzazz, Poppy Parade, Marina Mist, Whisper White
Accessories:  Candy Wrapper Sizzix Die, Oval Extra Large Punch, Timeless Type Alphabet Sizzlit Dies, 1/8" Taffeta Ribbon:  Early Espresso and Daffodil Delight

Friday, August 13, 2010

Stamp 'n Chat Catty Inspired


The theme for our monthly Stamp 'n Chat was to case a card from the current Stampin' Up catalog.  I chose a card on page 91 as my inspiration.  This is the last of the cards I made this weekend using the Timeless Type Alphabet Sizzlits.  I'll give those dies a rest as I just received my new shipment of goodies this week and can't wait to create projects with them this weekend.  I'm also going to post a recipe of the cookies I made for Stamp 'n Chat last nite in the next few days.

Stampin' Up Supplies Used:

Stamps:  Wicked Cool
Ink:  Rich Razzleberry, Basic Black, Old Olive
Paper:  Whisper White, Crumb Cake, Basic Gray, Basic Black, Old Olive, Rich Razzleberry
Accessories:  Mini Library Clips, Timeless Type Alphabet Sizzlits, Basic Rhinestones, Large Oval Punch

Thursday, August 12, 2010

4eVeR


This is the last of the graphic cards I made this weekend.  I know it's a bit early to be thinking Valentine's, so this card would work well as an Anniversary or Just Because card.  I've always liked the color combination of dark gray, red and white.  For visual interest, I mixed capital with lowercase letters for the message.  The heart is sporting the new rhinestone bling and is also die cut from the Timeless Type Alphabet Sizzlits.  I just realized that there are no stamps or ink used to make this card.  How much simpler can it get?

Stampin' Up Supplies Used:

Stamps:  None
Paper:  Basic Gray, Whisper White, Real Red, Celebrations DSP
Ink:  None
Accessories:  Timeless Type Alphabet Sizzlits, Basic Rhinestones

Wednesday, August 11, 2010

How Old?


Here's graphic birthday card #2.  This time I repeated the numbers motif and added the sentiment in the middle of all the swirling digits.  I need to use other stamps from the hostess set Afterthoughts soon or they'll feel neglected.  This is a good masculine birthday card.  I'm getting better at making male cards!  This blog has been great at stretching my comfort zone and making me utilize new design concepts and color combinations.

Stampin' Up Supplies Used:

Stamps:  Afterthoughts
Paper:  Sahara Sand, Marina Mist, Baja Breeze, Peach Parfait, Pear Pizzazz, Whisper White, Island Oasis DSP
Ink:  Early Espresso
Accessories:  Timeless Type Alphabet Sizzlits, Alphabet Simple Numbers Bigz Dies

Tuesday, August 10, 2010

Graphic Birthday Card #1


I just bought the Sizzix Timeless Type Alphabet Sizzlits and got a little crazy with them over the weekend.  I made 4 cards using the alphabets and letters!  Do you like that I repeated the stacked on top of each other imagery with the tea cups and then the letters spelling happy?  It's bold, graphic, clean and simple.

Stampin' Up Supplies Used:

Stamps:  Morning Cup, Afterthoughts
Paper:  Kiwi Kiss (Retired - sad face), Whisper White, Tempting Turquoise, Peach Parfait, Early Espresso, Real Red, Daffodil Delight
Ink:  Basic Black, Early Espresso
Accessories:  Timeless Type Alphabet Sizzlits

Wednesday, July 21, 2010

Vintage Matchbox


I'm generally a clean and simple gal, but I'm also drawn to the vintagey, collagey, shabby chic style too.  My friend Terri introduced me to this site called Vintage Home Lifestyle where I saw these fabulous matchboxes.  They gave me the inspiration for today's post.  Why not recreate them using Stampin' Up's Matchbox die, Newsprint DSP and various vintage stamp sets, especially Puns From the Past?  The DSP was distressed a bit to achieve the shabby feel.

Stampin Up Supplies Used:

Stamps:  Puns From the Past, Tiny Tags, Because I Care
Paper:  Newsprint DSP, Bravo Burgundy, Very Vanilla, More Mustard
Ink:  Early Espresso, More Mustard, Bravo Burgundy, Baja Breeze
Accessories:  Jewelry Tag Medium Punch, Linen Thread

Friday, July 2, 2010

It IS Easy Being Green


Have you seen these adorable gift coins at Target?  You can find them at the end of the aisles that hold gift cards; they're sold in bags containing 5 coins.  I thought these gift coins would be a wonderful favor for a child's birthday party and I was thrilled to see they fit perfectly in the Bitty Box Bigz XL die by Stampin' Up.  Ever wonder what to do with the brown paper that comes with your Stampin' Up shipments?  Go green, shred it and use as filler!


Stampin' Up Supplies Used:

Stamps:  Everything Nice
Ink:  Early Espresso
Paper:  Wild Wasabi, Marina Mist, Whisper White
Accessories:  1 3/4" Circle Punch, Linen Thread, Bitty Box & Envelope Bigz XL Die

Wednesday, June 30, 2010

Happy Birthday Big C!


My nephew is turning 3 in July and I made this card to send to him.  The card base is an airplane I cut with the New Arrival Cricut cartridge.  I thought it'd be fun to have the airplane pulling a banner announcing his age.  I made the "3" by cutting strips of paper, then sticking them on a Whisper White card base before cutting it with the Alphabet Simple Numbers Die.  I'll be writing his birthday message on the back of the banner.

Happy Birthday Big C!

Stampin' Up Supplies Used:

Stamps:  On Your Birthday
Ink:  Basic Black
Paper:  Bashful Blue, Going Gray, Vellum, Whisper White
Accesories:  Sherbet Designer Buttons, Sizzix Alphabet Simple Numbers Die, Linen Thread, 1/8" Circle Punch, Stampin' Dimensionals

Monday, June 21, 2010

Let's Be Clear


Today's post features cards made with clear transparency sheets.  Clear cards are unique and modern and very easy to make.  They are the perfect platform for rub-ons too.  I started these cards by painting the backside of the front of the cards with scrapbook paint.  I really wish Stampin' Up would offer paints in their exclusive colors; I sent in a product suggestion so I'm keeping my fingers crossed that they eventually will.  In the meantime, your local craft store has lots of fun colors to play with.  Allow at least 10 minutes for the paint to dry before proceeding.

The first card is another Father's Day card.  I made this for my non-stamping sister to give to our dad.  Since the card I made for myself featured a polka-dotted D, I thought my sister's should feature a striped D.  I used the same technique by creating a small scrap of paper with stripes before running it thru the Big Shot.  This is another good use of scraps.  The inside of the card holds a small scrap of Whisper White cardstock to write your sentiment.  It's approximately the same size as the painted area and is adhered to the inside with mini glue dots.  I rubbed on "Happy Father's Day" from the Chit Chat collection (I love all the sayings!) and then popped up the D with Stampin' Dimensionals.

The second card is a birthday card featuring the Flowers, Daisies #2 Big Shot die.  The rubon is also from Chit Chat.  I used a button from the Sherbet Designer Buttons collection for the center of the flower to add a pop of color.  Both of these cards took less than 10 minutes to put together; add drying time for paint and you're only at 20 minutes for 2 cards.

I hope these two quick cards inspire you to create a clear card soon!

Stampin' Up Supplies Used:

Stamps:  None
Ink:  None
Paper:  Whisper White, Marina Mist, Pear Pizzazz, Baja Blue
Accessories:  Flowers, Daisies #2 Big Shot Die, Chit Chat Rubons, Serif Essentials Alphabet, Sherbet Designer Buttons, Linen Thread, Mini Glue Dots, Stampin' Dimensionals, Transparency Sheet

Tuesday, June 15, 2010

Grand Soiree Invitation


My best friend's daughter turned 13 last year and wanted her invitation to feature a chandelier.  She's got impeccable style for a young lady!  So I dusted off my Grand Soiree stamp set and utilized a "corset" design to connote a French theme.  The back of the invitation is "laced up" using silver cord.  I used Stampin' Up's exclusive Table Setting die to create the corset belly band.  It was originally released in last year's Holiday Mini and I'm glad to see it'll be part of the new 2010-2011 catalog that will be released July 1.


Stampin' Up Supplies Used:

Stamps:  Grand Soiree (Retired)
Ink:  Basic Black
Paper:  Lavender Lace, Whisper White, Going Gray, Basic Black
Accessories:  Table Setting Sizzix Big Shot Die, 3/4" Circle Punch, Wide Oval Punch, Silver Cord

Monday, June 14, 2010

Auction Donation


I donated 25 invitations + 25 favors to an auction my friend Amy was holding last month and these were the samples I created for her to display.  I used an Accucut die to make the favor box to the far left and Sizzix Big Shot dies to make the boxes in the center and right.  The matchbox favor to the right uses a die that's exclusive to Stampin' Up only.  It's one of my favorite favor boxes to make.  I used heavy duty plastic sheets to make the clear slider portion of the matchbox.


Stampin' Up Supplies Used:

Stamps:  Everything Nice
Paper:  Pink Pirouette, Chocolate Chip, Pumpkin Pie, Old Olive, Whisper White, Kiwi Kiss (retired)
Ink:  Chocolate Chip
Accessories:  Circle Punches - 1 3/4", 1 3/8", 1 1/4", 3/4", 1" Double-Stitched Chocolate Chip Grosgrain Ribbon, Thick Window Sheets, Stampin' Dimensionals