Showing posts with label 3D. Show all posts

Friday, October 1, 2010

Enjoy Every Moment Blog Tour


For those of you arriving here via Mercedes Weber's blog, welcome! Mercedes is part of the monthly Stamp 'n Chat group I attend and she is a super stamper.  I always look forward to seeing what Mercedes creates.  I'm so thrilled to be a part of the Enjoy Every Moment Blog Tour. All this week I've been posting Halloween treat packaging ideas. Today's post is the highlight culminating the end of Treat Week and I saved the best for last. Here are 3 unique packaging ideas using mainly Sizzix dies, all exclusive to Stampin' Up.


Front View


Back View

The Haunted Tombstone treat is made with the Matchbox die.  I ran the slider portion thru the Spider Web embossing folder, then sponged with Whisper White Craft ink to really pop the web and give it an eerie, spooky effect.  The sides of the "tombstone" are lined with manicured "grass" which are just strips of snipped Old Olive cardstock.  "RIP" was die cut from the Timeless Type Sizzix Sizzlits Alphabet set and the little bat is from the stamp set Fang-tastic.  I stamped it first in Whisper White Craft ink and then hand cut it.  Lastly the gigantic full moon is punched with the 1 3/4" circle punch.

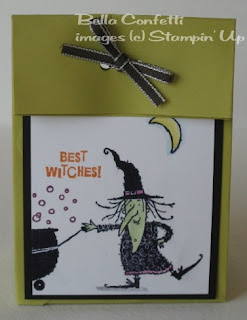
The middle treat is made with two Basic Black panels cut to 4.25" x 5.5" which are attached to a small paper bag.  I wheeled Frightful Fence using Versamark ink and then heat set with clear embossing powder.  Then I sponged Whisper White Craft ink again to create a cloudy Halloween nite scene.  The full moon is punched with the 1 3/8" circle punch and the witch, sentiment and pumpkin on the flip side are also from the Fang-tastic stamp set.

Lastly the abandoned Haunted House is made with the Milk Carton die.  The roof is just rows of Basic Gray cardstock punched with the Scallop Edge Border punch.  The door is a Word Window punch cut on one end to form a straight edge for the bottom.  The boarded up windows are made of 1/8" strips of Crumb Cake.  The black fence is a Martha Stewart border punch.

I hope you are inspired to create some of these Halloween treats!  The next person on the Enjoy Every Moment Blog Tour is the talented Brenda Keenan; I've been lucky enough to receive some of her swaps at Convention.


Wednesday, September 29, 2010

Trick or Treat Smell My Feet


Welcome to Day 3 of Treat Week.  Today's Peppermint Patty treat is encased in a holder made from the Sizzix Two Tags die exclusive to Stampin' Up.  The lovely witch's feet is from the stamp set Wicked Cool and I paper pieced the Rich Razzleberry stockings.  I was really surprised when I opened the bag of Peppermint Patties and discovered that the candy wrapping had changed.  I wanted neatly wrapped circular candies but found a four-sided treat instead; thus the treat is peeping out from within its packaging.


Stampin' Up Supplies Used:

Stamps:  Wicked Cool
Ink:  Basic Black, Rich Razzleberry
Paper:  Old Olive, Whisper White, Wicked Fun DSP
Accessories:  Scallop Punch, 1 3/8" Circle Punch, 1/8" Taffeta Ribbon Black, Cropadile

Tuesday, September 28, 2010

Mummy Dearest


Day 2 of Halloween Treat Week.  The mummy wrapped chocolate bar is not a new idea, but this is my take on it.  There's no stamping and very few accessories used.  Aside from cutting lots of strips of white paper in varying widths, this treat is easy to mass produce.  Start by cutting a piece of white cardstock to 6"x6".  Score at 2", 2.25", 4.75" and 5".  Fold at all score lines and use sticky strip on one end to create the little mummy "jacket".  Then make the eyes before wrapping with strips of white cardstock.  Lastly, I used yummy Peach Parfait ribbon to pull the hidden Hershey bar from its mummy wrap.

Stampin' Up Supplies Used:

Stamps:  None
Ink:  None
Paper:  Whisper White, Basic Black
Accessories:  Peach Parfait Poly Ribbon, Circle Punches:  1/2" and 1/4", Slot Punch (Retired)

Monday, September 27, 2010

Treat Week Begins!


I'm kicking off a week of Halloween treat ideas culminating with Friday's blog hop!  This treat is a pillow box cut out of heavy-duty clear sheets.  Tip:  I discovered that using a crease pad gives a cleaner cut and very visible crease lines when using thick plastic sheets.  The adorable vampire is from the stamp set Fang-tastic; isn't the accompanying greeting perfect?  It's hard to tell but I watercolored his face with Concord Crush; I know, it looks like he's got a gray, ashen face.

Stay tuned tomorrow for another Halloween treat idea.

Stampin' Up Supplies Used:

Stamps:  Fang-tastic
Ink:  Concord Crush, Rich Razzleberry, Old Olive, Peach Parfait, Basic Black
Paper:  Wicked Cool DSP, Basic Gray, Whisper White
Accessories:  Pillow Box Die, Circle Punches:  1 3/8" and 1 1/4", Stampin' Dimensionals

Friday, September 10, 2010

Stamp 'n Chat Halloween Treat


It's that time of the month again, my monthly Stamp 'n Chat with a group of talented local demonstrators.  Our theme this month was anything holiday.  I made a simple Halloween treat using the new Sizzix Candy Wrapper die.

Stampin' Up Supplies Used:

Stamps:  Halloween Hoot
Ink:  Rich Razzleberry, Basic Black
Paper:  Rich Razzleberry, Wicked Fun Specialty DSP, Whisper White, Basic Black
Accessories:  Sizzix Candy Wrapper Die, Circle Punches:  1 3/8" and 1 1/4", Raven 1/2" Lace Trim

Wednesday, September 1, 2010

Ribbon Flower Favor Box


A few years ago at a Stampin' Up Convention, we learned how to make flowers out of ribbon.  You basically take a big needle (the kind used for cross stitching) and sew a running stitch at the top of the ribbon.  Then at the end, pull the thread so the ribbon ends up scrunching together.  Stitch a securing stitch at the bottom to close off the flower and you've got a simple, cute adornment to put on boxes, cards, etc.  I love, love, love the 1.25" striped ribbon. 

Stampin' Up Supplies Used:

Stamps:  Afterthoughts (Level 1 Hostess Set)
Ink:  Pumpkin Pie
Paper:  Crumb Cake, Confetti Cream, Baja Breeze
Accessories:  1 1/4" Pumpkin Pie Striped Grosgrain Ribbon, Bitty Box & Envelope Sizzix XL Die, Build-a-Brad, Linen Thread, 1/2" Circle Punch

Tuesday, August 31, 2010

Lunch Notes


I was browsing thru a Paper Source catalog and saw a box of lunch notes for sale.  It didn't show what the notes actually looked like, but I liked the box that contained them, so I decided to create my own box + notes.  This project requires no stamping; the images are cut from the Doodlecharms and Sweet Treats Cricut cartridges.  The box measures 4x4" and the notes are just slightly smaller than that.  I printed the sayings with my computer and then cut the notes down to size.  Of course, my favorite Timeless Type Alphabet had to make its weekly appearance.

Stampin' Up Supplies Used:

Stamps:  None
Ink:  None
Paper:  Play Date DSP, Real Red, Bashful Blue, YoYo Yellow, Peach Parfait, Pear Pizzazz, Going Gray, Early Espresso, Whisper White, Crumb Cake
Accessories:  Dazzling Diamonds

Monday, August 30, 2010

Envelope Bag


Jessica Jones of How About Orange has done it again.  I was browsing her blog and saw these cute bags she made out of envelopes.  They gave me the inspiration to create this Halloween treat bag.  My bag is made from an A7 envelope from Paper Source which is 5.25 x 7.25".  I scored each of the sides and the bottom with a 1.5" border.  It's hard to tell that this bag was originally an envelope, isn't it?

Stampin' Up Supplies Used:

Stamps:  Halloween Hoot
Ink:  Basic Black, Going Gray, Rich Razzleberry, Pear Pizzazz, Pumpkin Pie, Daffodil Delight, Bashful Blue
Paper:  Basic Black, Whisper White
Accessories:  Early Espresso 1/8" Taffeta Ribbon, Aqua Painter

Friday, August 27, 2010

Haunted House Card Box


I made a box to hold my Halloween cards and turned it into a haunted house.  The house uses another set from the upcoming Holiday mini called Dark and Dreary.  The door is the Key Tag Punch (Retired) with one of the rounded sides cut to leave a straight side.  I made the fence by cutting strips of paper and then free form cutting triangles to top each post.  A Haunted House can't have the friendly white picket fence, can it?  The Happy Halloween image is serving as the "gable".  Have a great weekend!

Stampin' Up Supplies Used:

Stamps:  Wicked Cool, Dark and Dreary
Ink:  Basic Black
Paper:  Rich Razzleberry, Basic Gray, Old Olive, Whisper White, Daffodil Delight, Crumb Cake, Basic Black, Peach Parfait, Wicked Fun Specialty DSP
Accessories:  Key Tag Punch (Retired)

Tuesday, August 17, 2010

Packaged Cookie Favor


Momofuku Milkbar is a popular bakery in New York City.  I served these yummy copycat Momofuku Milkbar cookies at the Stamp 'n Chat I hosted last week.  I promised everyone in the group I'd post the recipe on my blog.  Instead of just taking a picture of the cookie, I decided to create a cute cookie packaging idea.  The cookie is housed in a simple and quick-to-make box.  Here's what the box looked like during the construction phase:


The dimensions of the box are 4" long by 3.5" tall.  Score at 1.5" on each of the short sides.  Then turn it lengthwise and score at 1/2" on each side.  As the picture above indicates, cut up to the score lines on all four sides.  Attach sticky strip to each side and adhere to create the box.  Attach 4 x 1.5" strips of decorative paper to the front and back of the box.  If you don't want your box to get greasy, wrap the cookie with a piece of parchment paper.  Use medium cellophane bags to package the cookie and tie it with Peach Parfait ribbon.  Before closing the bag, punch out 1/4" and 3/4" confetti circles in Peach Parfait and Melon Mambo cardstock and drop them in the bag.

Here's the recipe for the yummy copycat Momofuku Milkbar cookies.  The secret ingredient is caramelized cornflakes.  There's a recipe that's been posted on the internet, but I made a few changes to it.  This is my copycat of the copycat recipe.

Copycat Copycat Momofuku Cookies:

Caramelized Cornflakes

2 cups cornflakes
6 T milk powder
12 T sugar
1 tsp salt
7 T melted unsalted butter

Preheat the oven to 375 degrees F.  Lightly crush the cornflakes in a bowl.  Mix together the milk powder, sugar and salt.  Pour the butter over the cornflakes and sprinkle the dry ingredients on top.  Toss until evenly coated.  Spread out cornflake mixture on a lined baking sheet and bake for 15 to 20 minutes or until the cornflakes haave a deep caramelized color.

Remove from the oven and cool completely before using. 

Cookies

2 1/2 cups flour
1/4 tsp baking powder
1/8 tsp baking soda
Pinch of salt
1 c unsalted butter
1/2 c + 2 T sugar
1/2 c + 2 T light brown sugar
2 T corn syrup
1 large egg
1 T vanilla
1 package semi-sweet chocolate chips
1 1/2 c mini marshmallows
2 c caramelized cornflakes

Preheat oven to 350 degrees F.  Line baking sheet with parchment paper; set aside. 

In a large bowl, mix together flour, baking powder, baking soda, and pinch of salt; set aside.  Cream butter, sugars and corn syrup.  Add egg and vanilla and mix.  Add flour mixture and mix.  Add in chocolate chips, marshmallows and caramelized cornflakes.  Scoop dough into balls and place about 2 inches apart on prepared baking sheets.  Bake for about 12 - 15 minutes until cookies are golden brown.  Transfer to a wire rack to cool.

Enjoy!

Stampin' Up Supplies Used:

Stamps:  Homemade
Ink:  Peach Parfait
Paper:  Peach Parfait, Melon Mambo, Level 1 Hostess In Color DSP Pack
Accessories:  Medium Cellphane Bags, 2 3/8" Scallop Circle Extra Large Punch, Peach Parfait 1/2" Stitched Poly Ribbon, Circle Punches:  3/4" and 1/4"


Monday, August 16, 2010

Sneak Peak: Candy Wrapper Die

f

My oh my.  You are going to love all the fun new items to play with once the Stampin' Up Holiday Mini goes live on September 1st!  Here's a sneak peek at the new Sizzix Stampin' Up Exclusive Candy Wrapper Die.  Isn't it darling?  There are so many possibilities with it!  I made mine Christmas themed using the Level 1 Hostess In Color DSP pack.  I looooooooove this paper.  I used it for practically every project I created this weekend.  I may go into hoarding mode, that's how much I love it.  Anyway, these would make great Christmas favors or even placecards for your holiday table.  The paper is 6"x6" and is just the right size for the die.  AND I went back to using my favorite reliable Timeless Type Alphabet Sizzlits dies.  I'm getting my money's worth from these dies.  They're really worth the investment.

Stampin' Up Supplies Used:

Stamps:  None
Ink:  None
Paper:  Level 1 Hostess In Color DSP pack, Early Espresso, Pear Pizzazz, Poppy Parade, Marina Mist, Whisper White
Accessories:  Candy Wrapper Sizzix Die, Oval Extra Large Punch, Timeless Type Alphabet Sizzlit Dies, 1/8" Taffeta Ribbon:  Early Espresso and Daffodil Delight

Wednesday, August 4, 2010

Box Card


Shari Carroll is a talented stamper with great ideas.  I originally saw scrapplings posted on her blog a while ago.  The other day I saw another creative idea called the Box Card.  Shari has a video on her blog with all the steps.  Click here to view the video.  The card folds flat so you can mail it.  I love it!

Stampin' Up Supplies Used:

Stamps:  Aviary, Afterthoughts (Level 1 Hostess Set), Trendy Trees
Ink:  Versamark, Peach Parfait, Real Red, Early Espresso
Paper:  Peach Parfait, Baja Breeze, Greenhouse Gala DSP, Whisper White
Accessories:  Beautiful Butterflies Bigz Die, 1 3/4" Circle Punch, Basic Pearls,   Basic Rhinestones, White Embossing Powder

Tuesday, August 3, 2010

Please Remove Shoes Sign


Rae Dunn is a Bay Area artist who makes really cute items out of clay.  Check out her Etsy site here.  I have several of her pieces including salt and pepper cellars and olive serving dishes.  Anyway, I recently got the vintage stamp set Timeless Treasures and used it to case a sign that Rae makes.  I used a font called Vintage Typewriter and printed the message on watercolor paper.  The watercolor paper is mounted on a 4x4 piece of chipboard for sturdiness.  I love the new vintage ribbon SU introduced in this year's catalog.

Late addition to this blog post:  I'm going to enter it in the Really Reasonable Challenge #5 contest.  Here's the link to access the site.

Stampin' Up Supplies Used:

Stamps:  Timeless Treasures
Ink:  Basic Black
Paper:  Watercolor
Accessories:  Jumbo Eyelets, Victoria Crochet Trim

Tuesday, July 27, 2010

DIY Gift Bag


As I've mentioned before, I'm always on the internet looking for inspiration and design ideas.  One design blog I visit often is called How About Orange;  I saw a tutorial this weekend on how to make your own gift bags out of newspaper.  The gift bag called for a 15.5" wide x 8.25" tall piece of newspaper.  I decided to resize the bag so you can make it with a piece of 12"x12" patterned paper instead of newspaper.  I know it's not as "green" but it'll be more colorful!  I'm going to include step-by-step instructions below, but if you want to visit the original post, click here.

My tote is 4" tall by 3.75" wide by 2" deep.  Here's a picture with the dimensions.  You'll start with one 12"x7" sheet of patterned paper.


The top flap is 1.25" down from the top and the bottom flap is 1.75" from the bottom.  Make these horizontal score lines.  The vertical score lines are at 3.75", 5.75", 9.5" and 11.50".  There will be a 0.5" tab for you to glue the sides of the bags together.  Make nice sharp creases with your bone folder before proceeding to the next steps.

Cut two pieces of cardstock (A) to 3.75" x1".  Glue them on the 3.75" panels just below the score line as shown in the photo above.  These pieces of cardstock will reinforce the bag so it won't rip if it's holding something heavy.  Glue down the top with sticky strip for extra reinforcement.  Also glue the bottom flap and the side 0.5" tab.


The next step is to fold the bottom sides like you are wrapping a present.


Put sticky strip on the flaps to glue them together.


Stand the bag upright and cut a piece of heavy duty white cardstock to insert in the bag as a bottom reinforcement.  That piece will be 3.75" x 1.75".  If you want a handle for your gift bag, punch holes in the top rim of the bag with a Cropadile and add eyelets for guess what?  Reinforcement!  There's no waaaaay this DIY bag is going to fall apart.  String some thin ribbon or cord thru the eyelets and knot them on each end so the cord will stay put.  Standard is for the knots to be on the inside, but they can be unconventionally on the outside as well.  Why not?

That's it.  You've got your own handmade gift bag that you've made with your own two hands.


Stampin' Up Supplies Used:

Stamps:  None
Ink:  None
Paper:  Sweet Pea DSP (Retired), So Saffron
Accessories:  Daffodil Delight 1/8" Ribbon, Silver Eyelets


Wednesday, July 21, 2010

Vintage Matchbox


I'm generally a clean and simple gal, but I'm also drawn to the vintagey, collagey, shabby chic style too.  My friend Terri introduced me to this site called Vintage Home Lifestyle where I saw these fabulous matchboxes.  They gave me the inspiration for today's post.  Why not recreate them using Stampin' Up's Matchbox die, Newsprint DSP and various vintage stamp sets, especially Puns From the Past?  The DSP was distressed a bit to achieve the shabby feel.

Stampin Up Supplies Used:

Stamps:  Puns From the Past, Tiny Tags, Because I Care
Paper:  Newsprint DSP, Bravo Burgundy, Very Vanilla, More Mustard
Ink:  Early Espresso, More Mustard, Bravo Burgundy, Baja Breeze
Accessories:  Jewelry Tag Medium Punch, Linen Thread

Wednesday, July 14, 2010

3D Accordian File Organizer


I found this great tutorial on the ScorPal site for an Accordian File Organizer.  Of course I had to give it a try and see what I could come up with.  I decided to make my organizer sorta generic and came up with alphabetical dividers.  I printed the alphabet groups using the Amelie font and then punched them with the large oval.  The organizer stays closed with magnetic tape.  Wouldn't this be a great way to organize coupons?  I'm trying to play the coupon game, but haven't been too successful.  This organizer will help me store and sort them so they'll be easier to find??

Stampin' Up Supplies Used:

Stamps:  None
Ink:  None
Paper:  Celebrations DSP, Whisper White, Real Red
Accessories:   1 1/4" Striped Old Olive Grosgrain Ribbon, Daisies #2 Sizzix Die, Buttons #5 Sizzlits Die, Punches:  Large Oval and Round Tab

Thursday, July 1, 2010

I Know Why The Caged Bird Sings


A while ago I found a handmade paper birdcage on a design blog.  I saved the instructions but not the name of the blog so unfortunately I can't give credit where it's due.  I immediately thought the cage would be a great place to house the bird from Stampin' Up's Extra-Large Two Step Bird Punch.  And what is the birdcage lined with?  Newsprint Designer Series Paper of course!  Isn't that clever? 

The bottom of the birdcage is actually the top of an ice cream carton.  We have Smart 'n Final in CA where they sell empty white non-printed ice cream cartons.  If you can't find them, you can use any carton top or lid as long as it has a 1/2" lip.  

Start by cutting four 1/2 x 12" strips, one 1 x 12" strip of patterned paper and a circle large enough to line your cage bottom.  In the picture below, I originally cut two strips of patterned paper but only used one.  If you opt not to put the placard on your cage, you may need two strips.  It all depends on how big your birdcage bottom is. 


Punch out the bird and two wings.  Next line up the four 1/2 x 12" strips and poke a hole in the center at 6".  Poke a hole at the top of the bird and draw an eye.


Run one piece of linen thread through the four strips and also thru the bird.  Pop up the wings on both sides with Stampin' Dimensionals.  Then run a brad thru all four strips to secure them and for decoration.


On the side of the birdcage bottom, attach sticky strip.  Then stick the four strips to the bottom leaving even spaces in between.  Tip:  start with one strip on one side.  Then attach the other side.  Attach the next strip in the middle of where the first strip was attached.  It's like dividing a cake.  First you slice it in half, then the half into quarters and the quarters into eighths.  It's easier to get the even spacing if you work in alternating fashion like this.


Now you're ready to attach the patterned paper.  The last step is to add a placard if you choose.  I used two brads on the placard to make it look like a name plate.  Do you love how I photoshopped "Tweetie" into the picture?


Stampin' Up Supplies Used:

Stamps:  None
Ink:  None
Paper:  Greenhouse Gala DSP, Very Vanilla, Newsprint DSP, Baja Breeze, Daffodil Delight
Accessories:  Linen Thread, Extra Large Two Step Bird Punch, Paper Piercer, Stampin' Dimensionals, Rhinestone Brad