


My downline Amy came over on Saturday to craft. One of the projects we worked on was this little tote bag filled with three A4 sized cards. A lot of stamp sets will retire with the release of the new catalog in 3 short days and I'm glad to see Chic Boutique is a keeper! This tote bag was inspired by a project I saw on the Stampin' School website run by Linda Heller. Her version is bigger to accommodate A2 cards. Since I have an abundance of chipboard that I've never used, I decided to size my tote to fit smaller cards. Here is a picture showing the pieces and the sizes to create the smaller tote bag.

The 5 3/8 x 8" piece (A) is the interior of the tote bag and you'll need to score it at 3 1/2" (paper oriented lengthwise) and then turn it to score at 3 1/2" on the opposite side. This will leave you a 1" wide space to hold cards. Round the upper left and right corners for A.

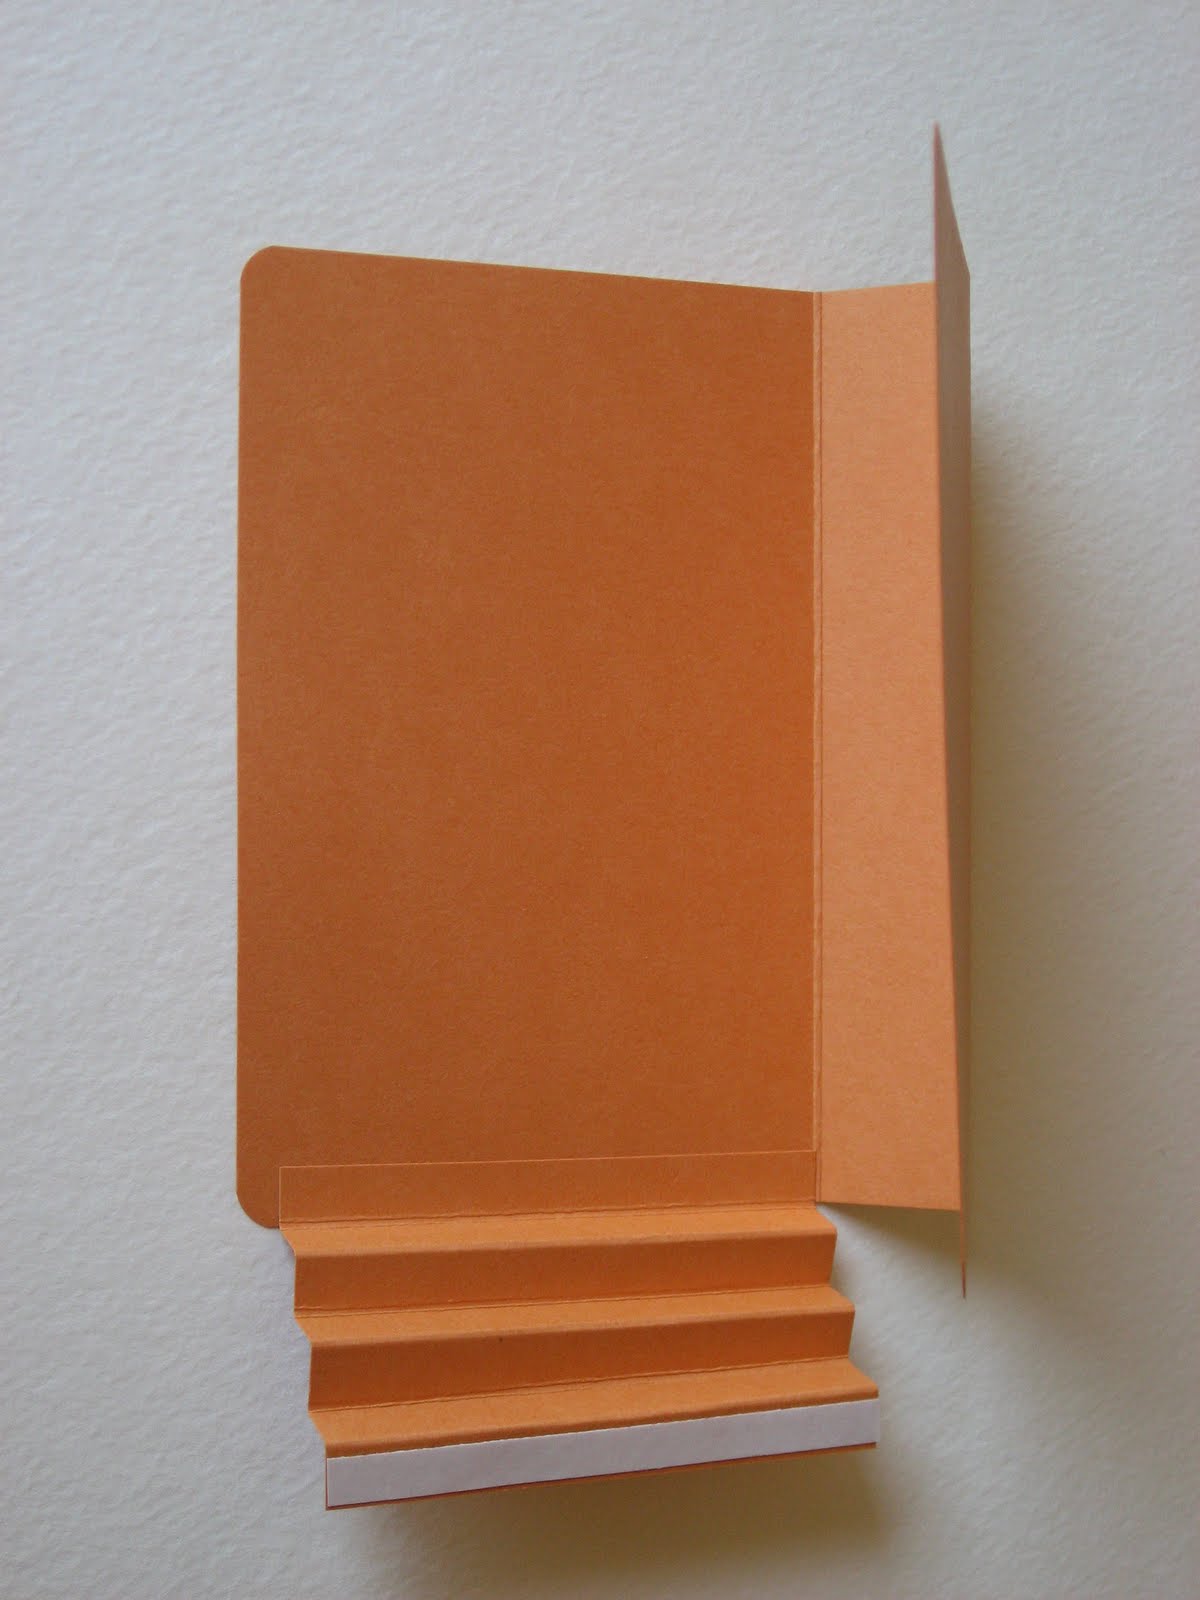
For the accordian sides, score B at 3/8" intervals (paper oriented heightwise). Fold each score line alternating valley and mountain folds.

Repeat for the 2nd accordian piece.
Next attach the accordian side to the tote's interior piece.
This is what the completed interior will look like.

You'll need to cut 2 pieces of C. Round all four corners and then mount the paper to the chipboard. The next step is to add the ribbon straps. My ribbon is cut to 13 3/4" because I want my straps on the outside. If you prefer the straps to be on the inside and covered by the patterned paper, you can cut it shorter. Use lined grid paper to help you align the sticky strips for straightness and even spacing.

The next step is to attach the pieces covered with patterned paper to the interior.

Finally, cut a strip of cardstock with dimensions 1 1/4 x 3" for the tote closure. Score at 1 1/2" and 2". Attach the shorter end to the back of the tote. For the front of the tote, punch a 1 3/4" circle monogrammed with the initial of your choice. The monogram has been heat embossed with white embossing powder.
Here is a side view of the completed tote.

I used magnetic tape for the tote closure. You can also use velcro. If you don't have chipboard, you can substitute heavy duty cardboard.
Have fun trying this project! If you have any questions, email me at bellaconfetti@gmail.com.

Stampin' Up Supplies Used:
Stamps: Chic Boutique, Contempo Alphabet
Ink: Versamark, Early Espresso, Pumpkin Pie
Paper: Island Oasis Designer Series Paper, Pink Pirouette, Baja Breeze, Chocolate Chip, Whisper White
Accessories: 1 3/4" and 1" Circle Punches, Early Espresso and Daffodil Delight Markers, Circle Fire Rhinestone Brad, White Embossing Powder, Heat Gun, 1" Chocolate Chip Grosgrain Ribbon
I love it!!! Great tutorial! Thanks for a another great idea!!!
ReplyDeleteA
Thank you for sharing your ideas! The purse is so cute!
ReplyDelete