Wednesday, February 28, 2018

My Favorite Carrot Cake Recipe


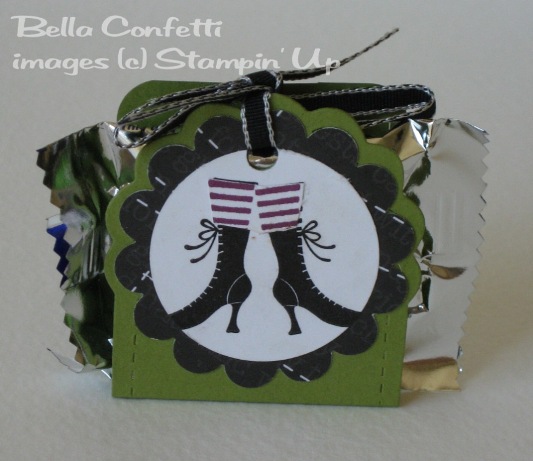
When it comes to carrot cakes, the more add-ins, the better. This means crushed pineapple, coconut, raisins AND walnuts.  This year, I made mini carrot cakes for my sister’s birthday, which was the day after Valentine’s.  A group of us went out to dinner and I gave these mini cakes as "favors”.  I lined tiny cake boxes with kraft parchment paper, attached handmade "LOVE" tags using this bundle from The Stamp Market and tied up the boxes with cute colorful baker's twine from Stampin' Up.  This recipe calls for a 13x9 inch pan but it can easily be adapted to other cake pan sizes.  I used 3” cake pans which yielded 4 cakes.

Cake:
2 c all purpose flour
1 tsp baking soda
2 tsp ground cinnamon
1/2 tsp salt
3 large eggs
3/4 c buttermilk
3/4 c vegetable oil
1 tsp vanilla extract
1-1/4 c plus 2 tbsp sugar
2 c peeled and grated carrots (about 2 to 3 large carrots)
1-1/2 c sweetened flaked coconut
1 (8 oz) can crushed pineapple (do not drain)
1 c chopped walnuts
1 c raisins


Cream Cheese Frosting:
12 oz cream cheese, softened
1/2 c unsalted butter, softened
1-1/2 tsp vanilla extract
4 c powdered sugar


Directions:
  1. Heat oven to 350°F.  Spray 13x9-inch pan with non-stick cooking spray.  Set aside. 
  2. For cake, whisk together flourbaking sodacinnamon, and salt in a medium bowl.  Set aside.
  3. Place eggsbuttermilkvegetable oilvanilla extract, and sugar in a large bowl and mix until smooth.  Slowly add in dry ingredients and mix until just combined.  Gently fold in carrotscoconutpineapple, pecans and raisins.    Pour batter evenly into prepared pan and bake 35 to 40 minutes or until cake springs back when pressed.
  4. While the cake cools, for frosting, add cream cheese and butter in large bowl and beat until fluffy.  Add vanilla extract and mix until combined.  Slowly add powdered sugar and mix until smooth.  
  5. Once the cake is cooled, evenly spread frosting over cake.  


Tuesday, February 27, 2018

Unconventional Chinese New Year Red Envelopes


A few weeks ago, I made these unconventional Chinese New Year red envelopes for my niece and nephews.  Since it's the Year of the Dog and Mama Elephant had just released their Favor Accessory - Dog die cut, I decided to forego passing out traditional red and gold envelopes and made my own.  In case you're interested, the die can be purchased here.  You can create various "breeds" of dogs depending on your creativity.  The envelopes were a hit!

Monday, February 26, 2018

My Favorite Banana Bread Recipe


I know it's been 8 years since my last post - where has the time gone?  I've been active on Social Media via my Instagram account @foodstraveller but after revisiting my blog a while ago, I realized I wanted to go back to blogging and share my travel, crafting and cooking pictures in more detail.  Blogging would allow this so here's my attempt at blogging 2.0.

Many, many years ago, when I was a young woman, I worked at Nordstrom selling men's shoes.  There were many great memories of that time in my life.  I took away many life lessons such as the "customer is always right".  I also took away the best banana bread recipe I've ever come across in my lifetime.  The recipe came out of an Employee Cookbook that was sold at the store.  Nowadays, Nordstom has published official fancy hard covered cookbooks, but back in the day, the cookbook I bought was a very "homemade" version with a spiral bound spine and a paper cover.  Here's the banana bread recipe from the cookbook with one edit by me.  I added some sour cream to the recipe.  This bread is amazingly moist.  You'll be thanking me like everyone who has ever had a slice of this bread.  It's heaven.  Enjoy!


Banana Bread

½ tsp salt
2 cups flour
1 tsp baking soda
½ cup butter
1 cup sugar
2 eggs
¼ cup sour cream
3 or 4 ripe bananas (mashed)
1 tsp vanilla

Preheat oven to 350 degrees F. 
In a bowl, sift together flour, baking soda and salt.  Set aside.  Cream butter and sugar with a mixer.  Add eggs, sour cream, bananas and vanilla.  Then add flour; do not overmix.  Pour into greased loaf pan.  Bake for 1 hour or until toothpick comes out clean.


Wednesday, December 1, 2010

Watercolored Cute Christmas


Here's a card I made for a Christmas Stamp-a-Stack class I held in November.  The trees are watercolored using markers that are scribbled on an acrylic block then the colors are picked up with an aqua painter.  This is one of my favorite methods of watercoloring.  I learned it at a Rubber Stamp convention and have adopted it ever since.

Stampin' Up Supplies Used:

Stamps:  A Cute Christmas, Sparkly & Bright
Paper:  Candy Cane Christmas DSP, Real Red
Ink:  Basic Black
Accessories:  Markers - Baja Breeze, River Rock, Pear Pizzazz, Old Olive, Peach Parfait and Real Red, Aqua Painter

Monday, November 29, 2010

Christmas Tags


Has it been 2 months since my last post?!?  Where has the time gone?  In early October, I took a 2 week vacation to Italy and after I got back, I started experiencing camera problems.  As I was debating whether to buy a replacement, my camera suddenly decided to started working again.  So I'm back in the blogging business.

I've been teaching a lot of classes during my 2 month blogging absence.  These Christmas tags are examples of what I'll be teaching this Saturday for my Bags 'o Tags class.

Stampin' Up Supplies Used:

Stamps:  A Cute Christmas, Sparkly & Bright, Contempo Christmas
Paper:  Real Red, Old Olive, Bashful Blue, Whisper White, Crumb Cake, Wild Wasabi, Kiwi Kiss, Early Espresso, Baja Breeze, Brushed Silver
Ink:  Real Red, Old Olive, Basic Black, Wild Wasabi, Early Espresso
Accessories:  1 3/4" and 2 3/8" Scallop Circle Punches, 1" and 1 3/4" Circle Punches, Timeless Type Alphabet, Round Tab Punch, Snowflakes Set #2, Basic Rhinestones 


Tuesday, October 5, 2010

Stampin' Up Clearance Rack


Stampin' Up just announced a Clearance Rack promotion.  From Oct 5 - 18, you can buy discontinued merchandise for up to 80% off!  Products are available to order online and qualifying orders are eligible for Hostess benefits (Hostess benefits given with minimum $150 merchandise total order).  If you didn't get a chance to stock up on discontinued paper, inks, accessories or other merchandise, now is your chance!  Hurry, supplies available while they last and all sales are final.

To place an online order, click here.

Friday, October 1, 2010

Enjoy Every Moment Blog Tour


For those of you arriving here via Mercedes Weber's blog, welcome! Mercedes is part of the monthly Stamp 'n Chat group I attend and she is a super stamper.  I always look forward to seeing what Mercedes creates.  I'm so thrilled to be a part of the Enjoy Every Moment Blog Tour. All this week I've been posting Halloween treat packaging ideas. Today's post is the highlight culminating the end of Treat Week and I saved the best for last. Here are 3 unique packaging ideas using mainly Sizzix dies, all exclusive to Stampin' Up.


Front View


Back View

The Haunted Tombstone treat is made with the Matchbox die.  I ran the slider portion thru the Spider Web embossing folder, then sponged with Whisper White Craft ink to really pop the web and give it an eerie, spooky effect.  The sides of the "tombstone" are lined with manicured "grass" which are just strips of snipped Old Olive cardstock.  "RIP" was die cut from the Timeless Type Sizzix Sizzlits Alphabet set and the little bat is from the stamp set Fang-tastic.  I stamped it first in Whisper White Craft ink and then hand cut it.  Lastly the gigantic full moon is punched with the 1 3/4" circle punch.

The middle treat is made with two Basic Black panels cut to 4.25" x 5.5" which are attached to a small paper bag.  I wheeled Frightful Fence using Versamark ink and then heat set with clear embossing powder.  Then I sponged Whisper White Craft ink again to create a cloudy Halloween nite scene.  The full moon is punched with the 1 3/8" circle punch and the witch, sentiment and pumpkin on the flip side are also from the Fang-tastic stamp set.

Lastly the abandoned Haunted House is made with the Milk Carton die.  The roof is just rows of Basic Gray cardstock punched with the Scallop Edge Border punch.  The door is a Word Window punch cut on one end to form a straight edge for the bottom.  The boarded up windows are made of 1/8" strips of Crumb Cake.  The black fence is a Martha Stewart border punch.

I hope you are inspired to create some of these Halloween treats!  The next person on the Enjoy Every Moment Blog Tour is the talented Brenda Keenan; I've been lucky enough to receive some of her swaps at Convention.


Wednesday, September 29, 2010

Trick or Treat Smell My Feet


Welcome to Day 3 of Treat Week.  Today's Peppermint Patty treat is encased in a holder made from the Sizzix Two Tags die exclusive to Stampin' Up.  The lovely witch's feet is from the stamp set Wicked Cool and I paper pieced the Rich Razzleberry stockings.  I was really surprised when I opened the bag of Peppermint Patties and discovered that the candy wrapping had changed.  I wanted neatly wrapped circular candies but found a four-sided treat instead; thus the treat is peeping out from within its packaging.


Stampin' Up Supplies Used:

Stamps:  Wicked Cool
Ink:  Basic Black, Rich Razzleberry
Paper:  Old Olive, Whisper White, Wicked Fun DSP
Accessories:  Scallop Punch, 1 3/8" Circle Punch, 1/8" Taffeta Ribbon Black, Cropadile

Tuesday, September 28, 2010

Mummy Dearest


Day 2 of Halloween Treat Week.  The mummy wrapped chocolate bar is not a new idea, but this is my take on it.  There's no stamping and very few accessories used.  Aside from cutting lots of strips of white paper in varying widths, this treat is easy to mass produce.  Start by cutting a piece of white cardstock to 6"x6".  Score at 2", 2.25", 4.75" and 5".  Fold at all score lines and use sticky strip on one end to create the little mummy "jacket".  Then make the eyes before wrapping with strips of white cardstock.  Lastly, I used yummy Peach Parfait ribbon to pull the hidden Hershey bar from its mummy wrap.

Stampin' Up Supplies Used:

Stamps:  None
Ink:  None
Paper:  Whisper White, Basic Black
Accessories:  Peach Parfait Poly Ribbon, Circle Punches:  1/2" and 1/4", Slot Punch (Retired)

Monday, September 27, 2010

Treat Week Begins!


I'm kicking off a week of Halloween treat ideas culminating with Friday's blog hop!  This treat is a pillow box cut out of heavy-duty clear sheets.  Tip:  I discovered that using a crease pad gives a cleaner cut and very visible crease lines when using thick plastic sheets.  The adorable vampire is from the stamp set Fang-tastic; isn't the accompanying greeting perfect?  It's hard to tell but I watercolored his face with Concord Crush; I know, it looks like he's got a gray, ashen face.

Stay tuned tomorrow for another Halloween treat idea.

Stampin' Up Supplies Used:

Stamps:  Fang-tastic
Ink:  Concord Crush, Rich Razzleberry, Old Olive, Peach Parfait, Basic Black
Paper:  Wicked Cool DSP, Basic Gray, Whisper White
Accessories:  Pillow Box Die, Circle Punches:  1 3/8" and 1 1/4", Stampin' Dimensionals

Friday, September 24, 2010

Easy Peasy Cards


You can't get any cleaner and simpler than these two cards.  I whipped these up for two birthdays I celebrated last weekend.  I stamped the greeting and then carefully chose the optimal spot to punch.  Notice I like having the word "cake" visible in both cards.

Have a wonderful weekend everybody!  We're expected to have a heat spell - Indian summer has arrived now that it's fall. 


Stampin' Up Supplies Used:

Stamps:  Everything Nice, Birthday Bliss
Ink:  Early Espresso
Paper:  Peach Parfait, Blushing Bride, Hostess Level 1 In Color DSP Pack
Accessories:  1" Circle Punch, Stampin' Dimensionals

Wednesday, September 22, 2010

Shabby Chic Bedroom


I cased this great card on the Splitcoaststampers site, a stamping community on the internet where people can share cards and projects with other stamping enthusiasts.  It's hard to see but the "wall" on my card has been scored to simulate bead board.  The striped "wallpaper" is from the Level 1 Hostess In Color DSP pack.  The base of the dresser was created with the new Decorative Label punch available in the Holiday Mini Catalog.  The drawers are the Modern Label punch jazzed up with Basic Rhinestone knobs and stamped with an image from the Artistic Etchings set.  There's a peek of something "lacy" in the open drawer.  And what Shabby Chic bedroom wouldn't be complete without a chandelier?  This one is from the retired set Grand Soiree.

Stampin' Up Supplies Used:

Stamps:  Artistic Etchings, Grand Soiree (Retired)
Ink:  Blushing Bride, Basic Black
Paper:  Whisper White, Level 1 Hostess In Color DSP Pack
Accessories:  Decorative Label Punch, Modern Label Extra Large Punch, Basic Rhinestones, Victoria Lace Ribbon

Tuesday, September 21, 2010

Get Ready for Fall


This is one of the cards I gave my sister-in-law as her birthday present.  Fall isn't quite quite here yet, but I've already transitioned in my mind.  Actually we never had a full-fledged summer here in Northern CA; it stayed pleasantly cool and comfortable.  

This card uses a retired stamp set called Branch Out.  I loved that set and wish it hadn't retired so soon.  Have you heard of a product called Flower Soft?  The Fall blend makes this tree come alive as if it is part of a tranquil scene in New England during leaf peeping season.  The muddy red boots and tire swing complete the scene.

Stampin' Up Supplies Used:

Stamps:  Branch Out (Retired), A Little Birthday Cheer (Retired)
Ink:  Early Espresso, Cherry Cobbler, Basic Black
Paper:  Early Espresso, Whisper White, Old Olive
Accessories:  Early Espresso Marker, Square Lattice Embossing Folder, Modern Label Extra-Large Punch

Monday, September 20, 2010

Faux Watercolor


I made this card for my sister-in-law's birthday which we celebrated this weekend.  I used the stamp set Inspired by Nature and colored the flower and stem with markers.  Before I stamped it on watercolor paper, I gave the stamp a light spritz of water and then stamped.  This technique gives the image a "watercolored" effect.  My favorite stamp set Afterthoughts is making its weekly appearance.  This card is 3.5" x 6".  I like this size; it's great for images that are long.

Stampin' Up Supplies Used:

Stamps:  Inspired by Nature, Afterthoughts, Tiny Tags
Ink:  Pink Pirouette, Pink Passion (Retired), Old Olive, Versamark, Early Espresso
Paper:  Pink Pirouette, Watercolor, Early Espresso
Accessories:  Linen Thread, White Embossing Powder, Jewelry Tag Medium Punch, Paper Piercer

Thursday, September 16, 2010

Coming Oct 1 - The Enjoy Every Moment Blog Tour!


I'm participating in my first ever blog tour!  Annette, the amazingly generous and talented leader of the Stamp 'n Chat group I participate in every month has organized a blog tour with nine Stampin' Up demonstrators.  Please mark your calendars and watch out for the tour on Oct 1!  I'm so excited and can't wait to unveil the projects I've been working on.